
A successful remodel starts with a detailed checklist for home renovation and an understanding of the four scales of renovation along with their realistic timelines. Cosmetic updates—paint, flooring, fixtures—are the quickest, usually taking 2–10 days per room. Medium-scale projects such as new cabinets, countertop replacements, or window updates can take 2–4 months and might require permits.
Structural work, such as load‑bearing walls, foundations, and new roofs, is much more complex, typically taking between 7 months and a year once inspections, surprises, and approvals are factored in. Finally, a full‑home renovation involves cosmetic, system, and structural updates; depending on the size and scope, it can take anywhere from 2 to 8 months or longer from planning to final walkthrough.
To keep any project on track:
- Clarify the vision & scope—define rooms, priorities, and style inspiration.
- Map project phases—design, permits, demo, rough‑ins, finishes, punch‑list.
- Research rules & materials—local codes, permits, lead/asbestos, product lifespans.
- Build a realistic budget with a 10‑15 % contingency.
- Understand professional pricing—labor often outpaces material costs.
- Identify safe DIY tasks vs. jobs best left to licensed pros.
- Secure permits & paperwork to avoid fines and delays.
- Vet and hire qualified contractors—check licenses, insurance, and reviews.
- Plan living arrangements—temporary relocation or protected “sanctuary” zones.
- Think long‑term ROI & functionality—balance resale value with daily usability.
Following this structured approach—anchored in clear communication, sequencing, and expert help—minimizes budget overruns, decision fatigue, and mid‑project surprises. Whether you’re refreshing a single room or gutting an entire house, these guidelines turn renovation from a stressful gamble into an organized, purpose‑driven investment.
Types of Renovation & Timelines
Before selecting paint swatches and contractor bids, it’s important to understand the different types of renovation—and how long each usually takes. One of the most common mistakes homeowners make is underestimating timelines, which leads to rushed decisions, budget overruns, and unnecessary stress.
Let’s break it down.
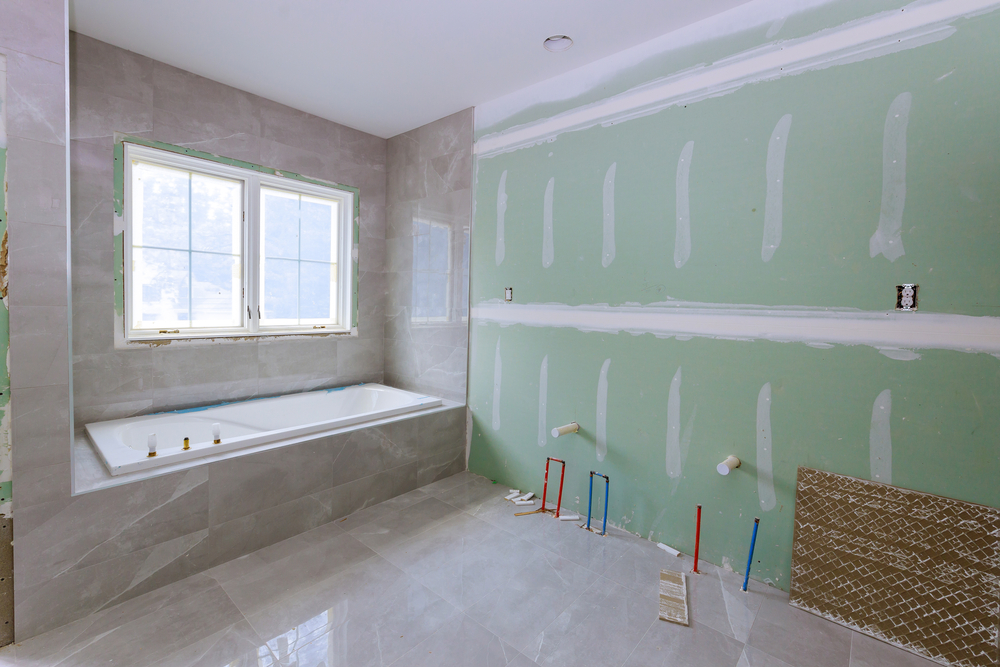
A. Cosmetic renovations
These are the quickest and most straightforward upgrades. They involve surface-level changes—no major plumbing, electrical, or structural work.
- What it includes: Painting, new flooring, light fixtures, trim, hardware, and cabinet refacing.
- Timeline: 2 to 10 days per room
Cosmetic upgrades are among the most common renovations, especially in kitchens and bathrooms. Don’t let the simplicity fool you—attention to detail matters. A high-quality finish can significantly boost the look and feel of your space.
B. Medium-scale renovations
These projects go beyond surface updates but stop short of major structural work. They often involve layout tweaks, system upgrades, or material replacements.
- What it includes: New cabinets, countertops, appliance relocations, window replacements, and electrical panel updates.
- Timeline: 2 to 4 months
Kitchen remodels and window replacements—particularly the latter, which are often one of the best home renovations for ROI—are top priorities for homeowners and require careful coordination across various trades. Permits may be needed depending on the scope, which can extend the timeline.
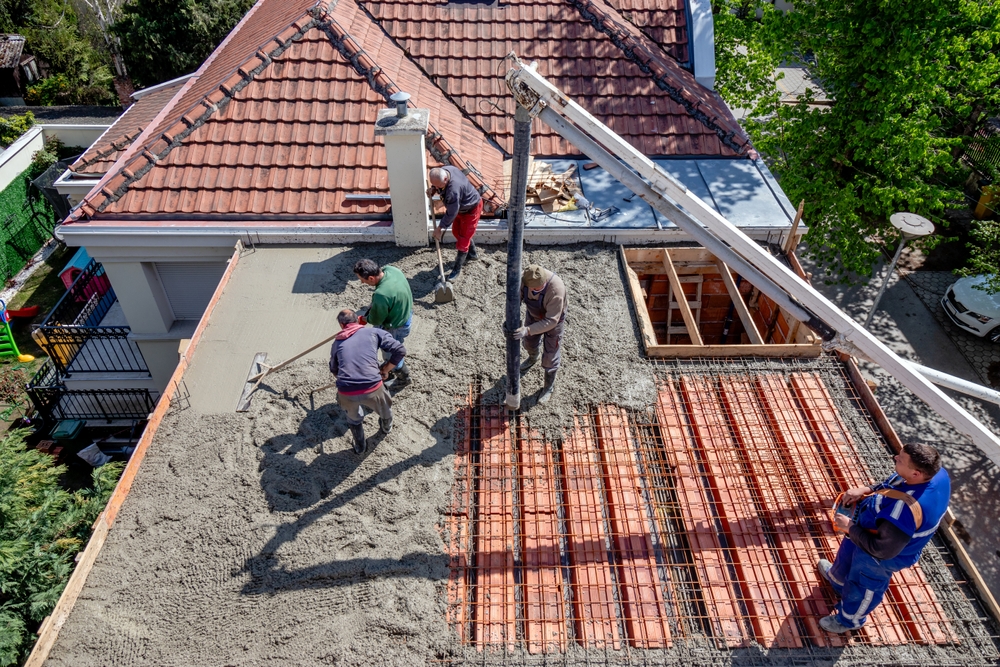
C. Structural renovations
When you undertake a structural renovation, you’re working on the very framework of your home—and that means everything gets a lot more complex and often slower.
Studies show that roughly 30% of home remodels uncover unexpected structural problems—such as foundation cracks, outdated electrical systems, or hidden water damage—which can significantly slow down timelines and increase costs.
- What it includes: Removing load-bearing walls, adding rooms, foundation repair, and roof replacement
- Timeline: 7 months to a year (or more)
Structural renovations need permits, inspections, and backup plans for surprises. Being upfront about the complexity—and preparing for the possible—can help keep projects on track when the unexpected happens.
D. Full renovations
A full home renovation is the ultimate transformation; a comprehensive overhaul that typically includes cosmetic refreshes, system upgrades, and structural changes across most or all rooms.
- What it includes: Gutting multiple rooms or the entire house, reworking layouts, replacing major systems (plumbing, HVAC, electrical), and upgrading finishes, appliances, flooring, and fixtures
- Timeline: Depending on the size and complexity of your home, expect a duration of between 2 to 8 months (or more).
A full-home renovation is a multi-phase project, beginning with design and permitting and ending with finishes and walkthroughs. With careful planning, realistic schedules, and a generous contingency fund, you can manage the process confidently and successfully.
No matter what kind of project you’re planning, understanding the scope and setting expectations early are essential first steps. To ensure you don’t overlook anything, use a proven home renovation checklist that guides you through every decision, detail, and deadline.
Don’t have one? Don’t sweat, we’re here for you, just keep reading.
Contact us here if you would like to find the best painting contractor for your residential or commercial painting needs.
The Ultimate Home Renovation Checklist

Renovating your home is more than just changing finishes — it’s about reshaping your life. So before you buy paint or hire contractors, let’s get strategic. This home renovation checklist breaks down the process into ten practical steps. Each one helps you stay in control, avoid surprises, and transform your space not just beautifully, but also practically.
Step 1: Define your vision
What is the first step in home renovation? Define your overall renovation goals and establish a vision. Are you making cosmetic improvements, doing a medium-scale update, making structural modifications, or undertaking a complete home transformation? This distinction is essential because each type has different objectives, costs, timelines, and team requirements.
Tasks:
- List the rooms in scope and categorize your plan as cosmetic, medium-scale, structural, or full renovation.
- Jot down must-have, nice-to-have, and deal-breaking elements.
- Gather inspiration (Houzz, Pinterest) and illustrate how the finished space should feel and function.
Use mood boards or design apps to bookmark near-final images. This clarity helps you avoid endless Pinterest scrolling, compare contractor proposals, and stay grounded when decisions get tough.
Your thematic vision also sets the tone in contract language, eliminating costly guesswork about your expectations.
A clear vision aligns your team, keeps the project focused, and addresses the first question of any renovation: What should be the first step in home renovation?
Step 2: Plan each phase of your project
Construction is a relay, not a sprint. Begin by mapping out project phases such as:
- Design & layout: This is your blueprint stage where you define the spatial layout, architectural details, finishes, and material choices. It involves finalizing floor plans, elevation changes, fixture layouts, and the overall aesthetic. A clear design plan helps prevent costly mid-process changes and ensures all parties are aligned on expectations.
- Permitting: Many tasks—such as adding walls, moving plumbing, or expanding square footage—require official approval. As planning resources note, permits typically take up to 3 weeks, and more complex projects may take longer. Plan early, submit paperwork upfront, and track approvals to prevent delays.
- Demolition: This phase involves tearing out finishes, removing old cabinets or flooring, and preparing the site. It often reveals hidden issues (e.g., rot, outdated wiring) that need additional repairs before proceeding.
- Rough-ins (structural, plumbing, electrical): Once bare studs are exposed, licensed trades perform major behind-the-wall work. HVAC ducts, wiring, piping, and framing modifications all occur here, so it’s essential to get inspections and approvals before covering them.
- Inspections: Local authorities will check the rough-ins before drywall is installed. Failed inspections can halt the project, requiring rework and re-inspection, which can delay progress by a few days or weeks.
- Surfaces & finishes: This includes drywall, trim, flooring, cabinets, paint, and lighting. After trades complete rough-ins and inspections pass, this phase transforms bare walls into finished spaces.
- Punch list and handover: Before final payment, walk through every room to check for defects, unfinished touches, or contract omissions. Fix issues before closing; this is also where you handle final paperwork and warranties.
A visual timeline helps you identify dependency chains. For example, you can’t paint until the drywall is finished or install flooring until the HVAC work is complete. With a clear plan guiding each phase, your renovation stays organized and adaptable—a living project, not just a to-do list.
Step 3: Do your research
Deep dive into legal, practical, and stylistic knowledge to avoid slowdowns and surprises.
- First, understand local rules and permits: research local building codes, zoning overlays, permit thresholds, historic‑district or HOA restrictions, and separate electrical/plumbing approvals. Skipping proper permits can stall work, incur fines, or force costly rework down the line
- Then, compare materials carefully: prioritize lifespan, long‑term value, maintenance, and warranty coverage. For example, vinyl flooring typically lasts 10-20 years, while laminates wear out within 15-25 years. Extended warranties may reduce future costs.
- Don’t overlook health and safety research: in homes built before 1978, lead‑safe renovation rules apply. Certified firms must follow EPA guidelines and conduct post‑work clearance testing to reduce risk
- Vet your team thoroughly: read online reviews, check references, and interview homeowners with similar projects. Hiring underqualified or unvetted contractors is a top cause of renovation nightmares.
- Study common pitfalls in older homes: Older homes often hide outdated wiring, corroded pipes, structural damage, or asbestos and lead-based materials. These issues usually don’t appear until demolition begins, and when they do, they can add unexpected time, cost, and complexity to your renovation.
This careful research builds a strong foundation, so your project proceeds smoothly, efficiently, and with fewer surprises.
Step 4: Break down your budget
A successful renovation starts with a smart budget. Don’t just plan for materials; factor in labor, permits, design fees, contingency (at least 10–15%), and a reserve for unexpected issues (especially in older homes). Overruns are common, and having a realistic budget is what separates a smooth project from a stalled one.
Start by outlining your must-haves versus nice-to-haves. Prioritize essential repairs, system upgrades, and structural fixes before allocating funds to cosmetic touches. Get multiple quotes from contractors, and always build in wiggle room for market price fluctuations—especially for materials like lumber, tile, or electrical components.
You can use tools like Hearth Financing that offer flexible options. With access to 17 lenders, you can explore personalized loans or credit cards that fit your project. Pre-qualification takes under 2 minutes and won’t affect your credit score. That means you can price out your project, apply for financing, and get started without delays.
Budgeting isn’t just about cost control; it’s about creating peace of mind. Knowing what you can afford, and how you’ll afford it, keeps your renovation focused, fluid, and financially sound from start to finish.
Step 5: Understand professional costs upfront
Every renovation comes with professional costs. Don’t wait until the invoices arrive to understand them. Whether you’re hiring painters, plumbers, or electricians, labor is usually the largest expense in a renovation budget. Knowing how contractors price their work helps you plan smarter and avoid surprises.
Take painting as an example. Exterior painting costs can range from $1,700 to $9,400, while interior painting usually falls between $3,000 and $11,000, depending on square footage, prep work, wall condition, and regional labor rates. Some professionals charge flat fees, while others bill per square foot or by the hour.
Costs vary by trade:
- Kitchen/bath remodels run $100–$250 per sq ft, primarily driven by cabinetry, countertops, plumbing, and electrical
- Plumbing, electrical, HVAC, and structural work typically cost $2,000–$15,000 or more, depending on complexity.
- General contractors often charge 10–20% of the total project cost, or $50–$150 per hour for smaller jobs
We can’t speak for everyone, but here at Koehn Painting, we start each project with a clear, detailed quote, even for full renovations.
Knowing how trades bill—from materials and prep to final finishes—lets you budget confidently and avoid billing surprises.
Also, remember to ask a few questions, such as:
- Are site visits and revisions extra?
- Can they manage scheduling and permitting?
- How do they handle change orders?
Request 2–3 quotes with matching scopes, and include references and portfolio check. We like to emphasize value over price—transparent, communicative professionals can save time and stress.
Step 6: DIY or don’t—what you can (and shouldn’t) do yourself
DIY might seem attractive—but data shows it’s often more hassle than it’s worth. A 2018 ImproveNet survey found that 63% of homeowners regretted at least one DIY project, and about one-third had to call a professional to fix or redo it. Cost overruns and delays were common, with many projects taking much longer and costing significantly more than expected.
Clever Real Estate research also reports that 74% of homeowners who renovated regret it, often citing overspending and delays. Notably, some regrets involved DIY overreach—tackling complex tasks without experience
To minimize risk and maximize savings:
- Limit DIY tasks to cosmetic or prep work, such as clearing surfaces or moving furniture.
- Leave structural, electrical, plumbing, HVAC, or major installations to licensed professionals.
- Errors in these systems can significantly increase costs and pose safety risks.
Savvy homeowners strike a balance: use DIY to save money on low‑risk tasks, and bring in professionals for critical systems. That approach reduces mistakes, protects your investment, and gives your renovation the best chance of success.
Step 7: Permits, license & paperwork
Getting permits, licenses, and the proper paperwork is essential, not optional. Any renovation that affects structure, electrical, plumbing, HVAC, or involves major layout changes usually requires a permit from your local building authority.
Failing to secure permits can delay a project, lead to fines, force removal of work, void insurance, or create resale issues later.
Typical permit costs vary by region and project scope—ranging from $530 to $3,040, with an average around $1,650, and complex projects can exceed $7,500. Small cosmetic updates like painting or re-flooring generally don’t require permits, but any work involving framing, roofing, or mechanical systems will.
Getting permits may take time—anywhere from weeks to months—depending on local backlog and project complexity. However, going through the process ensures safety compliance and can increase your home’s future resale value
To make the process easier, work with licensed professionals who understand local regulations and assist with permit acquisition as part of their service. Transparency here safeguards your investment and ensures your renovation is safe, legal, and ready to sell.
Step 8: Choose the right people for the job
Hiring the right professionals can make or break your renovation. From painters to general contractors, who you hire directly affects quality, timeline, and cost.
Start by:
- Gathering recommendations from friends or neighbors, and exploring trusted platforms like Yelp, Houzz, or Google Reviews. A contractor’s reputation and portfolio speak volumes. For example, Koehn Painting is consistently rated among the top painting contractors in Wichita for both residential and commercial projects.
- Verifying licenses and insurance. While Kansas doesn’t require state licenses for painters, those handling lead-based paint must be certified by the Kansas Department of Health & Environment. Insurance coverage is also essential to protect you during the project.
- Reviewing experiences and portfolios to ensure they match your vision. A company with experience in both interiors and exteriors shows flexibility and attention to detail.
- Requesting detailed written estimates—including scope, materials, and timeline—to avoid surprises. Clear communication is also key. Choose a contractor who’s responsive, punctual, and transparent.
Home remodeling is no joke. Taking the time to vet your renovation team pays off in fewer mistakes, better results, and less stress. When you work with professionals, you’re investing in peace of mind and long-term value.
Step 9: Plan for living arrangements
Living through a renovation can be disruptive, but with smart planning, it doesn’t have to derail your routine or sanity.
First, evaluate whether to stay or relocate. For high-impact projects—such as kitchen, bathroom, or full-home remodels—temporary relocation often reduces stress and speeds up the work. Extended‑stay hotels, short‑term rentals, or stays with friends/family offer flexibility and comfort if the renovation affects daily living spaces. Budget 25–50% of your usual monthly housing cost for temporary accommodations.
If you stay home, follow expert advice to manage disruption:
- Designate a sanctuary zone, away from dust and noise, for meals and relaxation.
- Set up a temporary kitchen, using small appliances like a microwave or toaster oven, so you aren’t reliant on takeout
- Manage dust and access by installing plastic barriers, taping off work areas, sealing HVAC ducts, and designating a single contractor entry point.
- Stagger bathroom or kitchen work—renovate one at a time so you always have functional facilities available
With thoughtful living arrangements—whether onsite or off—you’ll minimize chaos and help your renovation finish efficiently and safely.
Step 10: Think long-term—ROI & functionality
Last but not least, let’s discuss ROI. Renovating isn’t just about looks; it’s also about how your space and investment pay off over time. Smart projects balance daily functionality with potential resale value.
Consider these high‑ROI upgrades:
- Minor kitchen remodels typically recoup about 70–80% of costs by improving usability and appeal. Major remodels usually return around 50–60% when done thoughtfully.
- Bathroom updates yield 60–70% ROI, especially when combining neutral finishes with modest layouts.
- Exterior upgrades—such as new siding, garage doors, or decks—typically recoup 50–95% of costs, depending on materials and curb appeal.
But ROI isn’t just about resale numbers. Prioritize upgrades that improve your daily life, like an open-concept layout, efficient HVAC, smart-home devices, or a functional home office—even if ROI is modest, the quality-of-life gains are meaningful.
That said, be cautious about over-improving beyond your neighborhood standard. High-end custom features or ultra-luxury finishes often underdeliver when it comes time to sell.
In short: choose renovation projects that solve everyday problems and align with market expectations. That way, you’ll enjoy your home today and still capture value tomorrow.
Bringing It All Together
This final checklist for home renovation takes you from What is the first thing for home renovation? to What to check after renovation?, weaving clarity, structure, and strategy into each step:
- Define vision & scope
- Plan project phases
- Research thoroughly
- Create a detailed budget
- Nail down pro pricing
- Identify DIY vs. pro tasks
- Secure permits
- Vet & hire the right team
- Organize living logistics
- Prioritize ROI & inspect quality
With these steps anchored in research, reviews, and realistic expectations, your renovation isn’t just planned—it’s purpose-driven.
Final Thoughts: Use This Checklist for Home Renovation Success
Every successful project begins with a solid plan, and hopefully, this checklist for home renovation will be your go-to guide for confidently navigating each step. From defining your vision and breaking down your budget to understanding professional costs, permits, and living arrangements, we designed these steps to help you minimize surprises and maximize results.
Knowing what to DIY (and what not to), choosing the right team, and thinking long-term about ROI ensures your investment pays off in comfort, function, and future value.
Most importantly, different types of renovations don’t happen in isolation. They require clear communication, smart sequencing, and expert execution. And that’s where trusted professionals come in.
Discover the Koehn Painting difference – contact us today for a free estimate and step into a vibrant, freshly painted home!