Step-By-Step: How to Power Wash Brick
Before you even think about pressure washing brick, the first step isn’t to turn on the machine—it’s to walk around your home and take a close look at the masonry. Brick is tough, but it’s also porous and relies on mortar joints for stability.
If those joints are weak or the bricks are already crumbling, blasting them with water will only speed up the damage. Skipping this inspection is one of the fastest ways to turn a cleaning project into a repair bill.
Step 1: Inspect your brickwork
Before you power wash brick, begin by:
- Inspecting for cracks and chipping. If the brick face is already crumbling or flaking, spraying it with water will only worsen the damage. Any loose bricks should be secured, and damaged sections repaired before cleaning.
- Checking the mortar joints. High-pressure water can dislodge mortar that’s already weakened, leaving gaps where water can seep in and create hidden moisture issues.
- Considering the age of your home. Experts caution against pressure washing older brickwork (typically 75-80+ years) because the masonry is too fragile to withstand even moderate PSI.
- Patching repairs early. If you need to repoint mortar or fill cracks, allow the material to cure for at least a week before introducing water pressure.
- Knowing when not to wash. In cold climates, avoid pressure washing during freezing weather. Trapped moisture can expand during freeze-thaw cycles, leading to cracks or spalling.
Step 2: Prepare the area
Also, make sure you follow these safety precautions before cleaning:
- Clear the area. Remove outdoor furniture, planters, or décor items that could be damaged or create tripping hazards.
- Protect plants and outlets. Cover nearby shrubs, flowers, and electrical outlets with plastic sheeting to shield them from cleaning solutions and spray.
- Close windows and doors. Water can easily seep through cracks around frames, so ensure everything is sealed before you start.
- Wear protective gear. Safety glasses, gloves, and hearing protection are essential, especially with gas-powered washers.
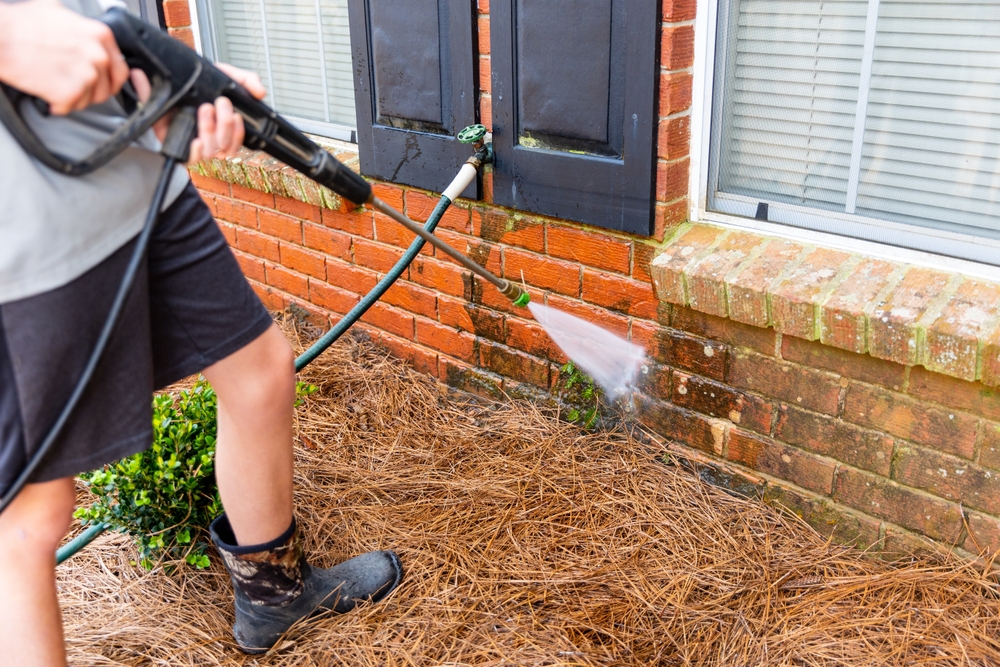
Step 3: Set up your pressure washer
Now it’s time to prepare the machine. Since not all pressure washers and settings are suitable for masonry, this step involves adjusting the settings.
- PSI settings: Begin around 500 PSI and never exceed 1,500 PSI. This is the sweet spot most brick manufacturers recommend; anything higher risks permanent damage like delamination or fretting (the slow crumbling of brick).
- Nozzle choice: A wide-angle nozzle, usually 25°-40°, is best for brick because it spreads the water out. Narrow, pinpoint nozzles can etch brick or blow out mortar.
- Cleaning solutions: Use only mild, masonry-safe cleaners. Avoid harsh chemicals like muriatic acid, ammonia, or drain cleaners—they can dissolve the outer surface and weaken mortar joints.
- Pre-wet the wall: Before applying detergent, use a garden hose to soak the surface from top to bottom. This helps prevent streaks and stops the solution from absorbing too deeply into the brick.
Step 4: Apply cleaning solution
With the wall saturated, you can apply your chosen detergent.
- Work in small sections to keep the detergent from drying before rinsing.
- Start from the bottom and work upward; this reduces streaking and ensures even coverage.
- Let the solution sit for several minutes, giving it time to break down dirt, mildew, and stains. But don’t let it dry on the surface, as that can leave behind residue.
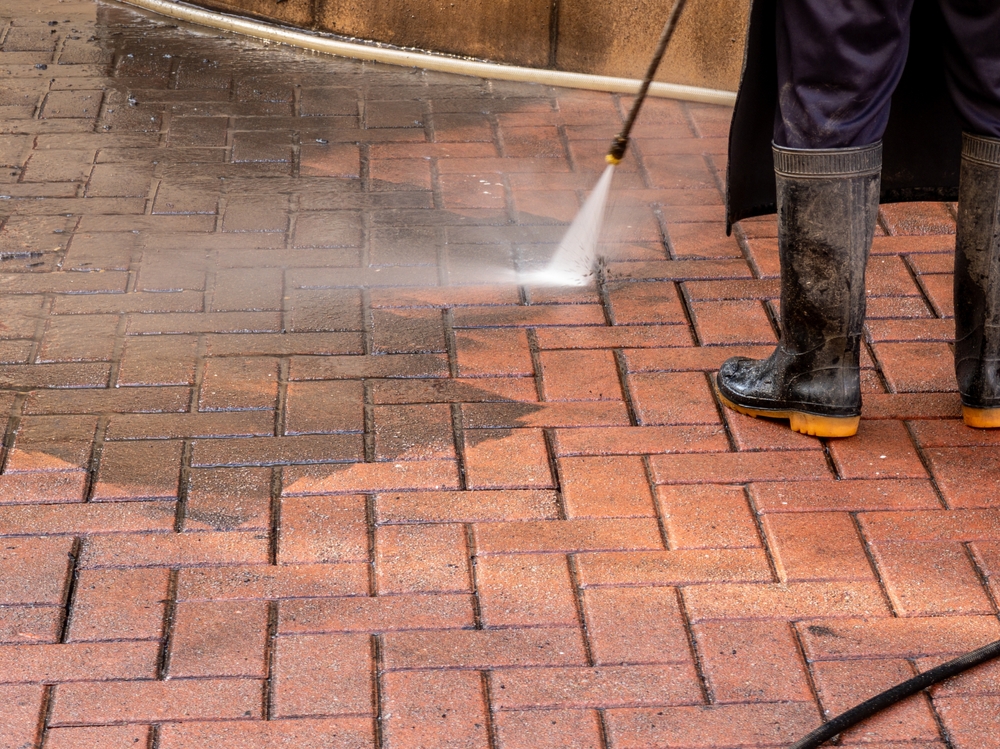
Step 5: Rinse the brickwork
Once the solution has had time to work, it’s time to rinse.
- Switch your washer back to water-only mode, disengaging the detergent supply.
- Spray in controlled, sweeping motions from top to bottom, which flushes grime away evenly without leaving streaks.
- Keep the nozzle 12–18 inches away from the surface to prevent scarring or chipping.
- Take your time. Rushing can lead to missed spots or uneven cleaning.
Step 6: The end, final touches, and clean-up
The last step is about leaving the area safe and your brick in its best condition.
- Rinse the surroundings. Flush the ground, nearby plants, and landscaping with clean water to dilute any detergent residue.
- Check for stubborn stains. For algae or mildew, a diluted bleach mixture (1 cup bleach to 1 gallon of water) can be applied carefully, but only after pre-wetting the surface and rinsing thoroughly afterward. Only use bleach as a last resort, as oxygen-based cleaners are a safer alternative.
- Shut down the washer. Follow your machine’s manual to relieve pressure, drain the pump, and store the washer safely.
- Let the brick dry fully. Before applying sealers or moving furniture back, allow the surface to air dry completely. This reduces the chance of trapping moisture inside the wall.
Finishing a wash is only half the job. Once the surface is clean, the real challenge is keeping it that way. Brick that’s just been pressure-washed looks fresh and renewed, but without proper follow-up care, it can quickly become dull or, worse, show signs of moisture damage.
The next step is about protecting your investment: sealing, scheduling inspections, and adopting simple maintenance habits that help your brick stay strong for years.
Let’s examine how to preserve results after pressure washing brick so your effort isn’t lost.
Contact us here if you would like to find the best painting contractor for your residential or commercial painting needs.
How to Maintain Results After Pressure Washing Brick
You’ve already invested in a quality clean, so now it’s time to preserve that fresh finish. Pressure washing brick isn’t a one-and-done job; instead, it’s the start of a maintenance cycle that keeps your masonry looking sharp and structurally sound.
So, here are a few tips you can revisit to maintain your results after pressure washing brick.
- Don’t overwash, maintain smartly
Brick may look tough, but treating it like concrete is a mistake. Pressure washing brick should be done only when necessary—only wash when needed (every few years), and use soft washing or spot cleaning in between.
In humid or shaded climates, spot clean or use a soft wash as needed; reserve full-pressure washing for every few years. Just remember: less pressure doesn’t mean less effectiveness, and it keeps your brick safe.
- Seasonal inspections keep damage away
Every spring and fall—especially after rain, snow, or pollen seasons—give your brick a once-over. Look for:
- Efflorescence (white powdery staining)
- Algae or moss in shaded joints
- Cracked mortar or chipped brick
Catching these early lets you address minor issues before they become expensive problems.
- Seasonal inspections keep damage away
Brick requires low maintenance, not zero maintenance. Dirt, algae, and mildew will come back over time, especially in humid or shaded areas. To keep it looking good, choose gentle cleanings in between rather than blasting your walls again.
A soft wash method, such as using low-pressure water with biodegradable cleaners, is recommended as the safest way to keep surfaces bright without compromising their structure. This not only maintains that “freshly cleaned” appearance but also prevents premature wear and tear.
If you’ve ever looked at a power wash brick before and after photo, you know the dramatic difference it makes. Gentle upkeep between washes is how you extend that “after” look as long as possible.
- Reapply sealant for longevity
Once your brick is fully dry, applying a high-quality sealant is one of the best ways to lock in results:
Silane/Siloxane sealers offer breathable, water-repellent protection without altering appearance. Plus, they shield brick from water intrusion, stains, and freeze-thaw damage, while preserving its natural look.
Make this part of your routine maintenance every few years, or sooner if your property is heavily exposed to weather or pollutants.
- Manage landscaping and moisture around brick
Plants clinging to brick can appear charming, but they also trap moisture and conceal damage. Trim vines and shrubs away from walls, and make sure gutters and downspouts direct water safely away.
If brickwork gets wet from splash-back or leaks, dry it promptly and consider touching up sealant to stop moisture from getting in. Managing moisture is one of the simplest ways to keep your last power wash brick job looking sharp.
- When Brickwork needs more than a wash
For older or delicate masonry, specialty systems like DOFF or TORIK provide ultra-safe cleaning that doesn’t damage the surface. These are especially helpful for heritage or historic homes where preservation is as important as appearance.
If you’re wondering how to make brickwork look new, the answer usually involves a few key strategies: cleaning when necessary, gentle cleaning in between, sealing for protection, and controlling your environment. These steps help keep your masonry strong and attractive year after year.
Extra Tips, Techniques, and Common Mistakes
Even after a successful cleaning, how you handle your brick makes all the difference. Experts agree that using a pressure washer incorrectly can shorten the life of masonry, while smart habits help protect its structure and curb appeal.
Some pro tips for better results:
- Start low, go slow. Begin at 500 PSI and only raise if necessary to avoid etching mortar.
- Keep the nozzle moving. Use wide-angle tips (25°–40°) and sweep in even motions to prevent streaks or gouges.
- Try soft washing. Using low-pressure water with mild, biodegradable cleaners between heavy cleanings is safer and helps keep brick bright longer.
And some common mistakes to avoid:
- Too much pressure. Exceeding 1,500 PSI can trigger delamination (slow crumbling)
- Staying in one spot too long while spraying can damage brick or strip mortar.
- Harsh chemicals & tools. Muriatic acid, ammonia, or wire brushes weaken brick and leave stains
- Skipping safety gear. Goggles and gloves prevent injury from backsplash and debris.
Maintaining brick is about balance. Respect its porous nature, use the right tools, and avoid shortcuts. Done right, your brick will stay strong, safe, and beautiful for decades.
Can You Do Pressure Washing Brick Yourself?
Can you do pressure washing brick yourself? The short answer is yes; pressure washing brick can be a DIY project if you have the right equipment, patience, and a careful eye for detail. But it’s not as simple as just pointing a hose at your walls.
From selecting the right PSI and nozzle to inspecting mortar joints and applying sealant, many steps are involved. That’s why many property owners ultimately choose to work with professionals.
A trained crew doesn’t just clean brick; they protect it. They understand when to adjust pressure, which cleaning solutions are safe, and how to seal for long-term protection. Plus, the efficiency and consistency they provide often produce results that DIY efforts can’t match.
At Koehn Painting, we help extend the life of your property. Our team uses the right tools, proven techniques, and years of experience to make your brickwork look its best while ensuring it remains structurally sound.
If you are ready to restore and protect your brick the right way without worrying about each of these steps and common mistakes, give us a call.
FAQS on Brick Washing
Is it okay to pressure wash bricks?
Yes, but only when necessary and at low pressure (500–1000 PSI) to avoid mortar damage; limit it to about once a year.
Is 2000 PSI sufficient for cleaning brick?
2000 PSI is powerful and carries significant risk; professionals recommend staying below 1500 PSI unless absolutely necessary.
Is it better to pressure wash or soft wash brick?
Soft washing (low-pressure plus detergents) is gentler and safer, especially for removing mildew and algae, without risking mortar damage.
Can you jetwash brickwork?
Technically yes, but jet washing uses high pressure and can erode mortar or crack bricks, so proceed with extreme caution.
How best to clean brickwork?
Use a gentle, low-pressure spray of masonry-safe detergent—start from the top and work down—and rinse carefully; soft washing is best for maintaining results.
How do you clean dirty exterior brick?
Mix mild detergent with water, apply gently (e.g., soft wash), scrub with a soft brush, and rinse carefully. Never use harsh acids.
How to make brickwork look new?
Pressure wash with low PSI or soft wash, repair damaged mortar, and then apply a breathable sealant to rejuvenate and protect the brick.
How to freshen old bricks?
Remove surface grime with a soft wash, use a gentle acidic cleaner like diluted vinegar for tough stains, rinse, then reseal.
How to brighten up exterior brick?
Use an oxygen-based cleaner or a mild bleach solution, scrub gently, rinse thoroughly, and consider sealing to improve brightness over time.
Discover the Koehn Painting difference – contact us today for a free estimate and step into a vibrant, freshly painted home!


")