The Real Pressure Washing Guide (Regardless of Your Knowledge)
Pressure washing seems straightforward… until something goes wrong. Many DIYers realize too late that this isn’t just a hose with attitude, it’s a high-pressure system capable of etching concrete, stripping paint, or damaging siding in seconds. That’s why understanding the machine, the method, and the material is crucial long before you pull the trigger.
These are the pressure washing tips that experienced pros and savvy homeowners follow to clean smarter, safer, and more effectively.
Step 1: Safety first—personal & property protection
Pressure washing isn’t dangerous because it’s complicated; it’s dangerous because of its power. With enough pressure, water jets can etch concrete, cut skin, or dislodge loose mortar—especially when used improperly or too close to the surface. Even a quick burst in the wrong direction can cause lasting damage.
According to WET, personal protective equipment (PPE) is the first and most essential step for safe pressure washer use. It protects you from the most common injury risks:
- Lacerations and abrasions from high-pressure streams
- Eye injuries caused by flying debris and ricochets
- Chemical burns from cleaning agents
- Hearing loss from prolonged exposure to loud equipment
- Carbon monoxide poisoning from gas-powered washers used in enclosed spaces
But it’s not just about the medical risks. Slippery surfaces increase the chance of falls. Loud engines can harm your hearing. And without proper preparation, your powerful spray could wet electrical outlets or knock loose something you didn’t mean to contact.
That’s why PPE is step one, not an optional accessory. Here’s what proper pressure washing PPE includes:
- Heavy-duty raincoat and bib: Wear a PVC or rubberized raincoat paired with full-coverage rain pants or a bib. These garments serve as a barrier against high-pressure spray, hot water, or chemical backsplash. They are especially useful for large jobs or when using detergents that could irritate the skin.
- Rubber-soled boots: Traction is crucial when walking on slick, soapy, or algae-covered surfaces. Rubber boots help you stay grounded, literally. They also offer insulation against electric shock, which is vital if you’re using an electric pressure washer near wet areas.
- Gloves that Grip: Don’t settle for thin garden gloves. Use heavy-duty rubber gloves designed for chemical resistance and wet grip. These protect your hands from cuts, burns, and long-term vibration exposure while improving control of the wand.
- Eye and face protection: Including eye protection in any pressure washing tips list is essential. Even when not using chemicals, pressure washing can send dust, paint chips, wood splinters, and grit flying around. Always wear safety goggles or glasses, and if you’re working near chemicals or spraying upward, add a face shield to protect your nose, mouth, and eyes.
- Hearing protection: Gas-powered pressure washers frequently produce 90–100 decibels or more, which can cause permanent hearing damage with prolonged exposure. Use earplugs or earmuffs, especially during extended jobs or when using larger equipment.
Additional safety habits that matter
Even the best gear won’t save you from poor handling or a bad setup. Here are essential tips backed by the CDC and PWSquad:
- Inspect your machine before each use. Look for cracked hoses, loose fittings, or clogged nozzles that could fail under pressure.
- Avoid ladders at all costs. The kickback from a pressure washer can knock you off balance. Use an extension wand or attach a surface cleaner for reach.
- Secure the area. Remove loose tools, toys, or furniture. Rope off spaces where others might pass by.
- Use GFCI outlets and keep cords dry. Avoid puddles and never tape or splice power cords.
- Never aim at people, pets, or glass surfaces. The jet stream can cause serious harm in milliseconds, even from several feet away.
- Ventilate properly. Gas-powered machines emit carbon monoxide. Only use them outdoors or with the engine placed well away from doors, vents, or open windows.
Step 2: Know your machine: Pressure, flow, nozzles & power sources
Pressure washing isn’t just about aiming and spraying. If Step 1 was about protecting yourself, Step 2 is about understanding the tool in your hands. And not just what button to press, but how the machine itself works, and how to make it work for you.
PSI numbers alone won’t tell you if your washer is right for the job. Without the proper nozzle, flow rate, and power source, even a 4,000 PSI machine can underperform, or worse, damage the surface you’re cleaning.
Let’s break it down.
Pressure vs. flow
PSI (pounds per square inch) measures the pressure of your washer, but GPM (gallons per minute) measures the volume of water moving through the system. Together, they determine the real cleaning power—also known as cleaning units (CU), calculated by PSI × GPM.
Water pressure in residential taps is usually around 3–4 bar (45–60 PSI), while pressure washers can range from 100 to over 500 bar (up to 7,000+ PSI for industrial units). But pressure alone isn’t everything. A higher GPM clears debris faster and more effectively, especially on wide surfaces.
A 2,000 PSI machine at 1.5 GPM (3,000 CU) is very different in performance from a 2,000 PSI machine at 3.0 GPM (6,000 CU). Always consider both numbers.
Nozzles: the tip is the tool
The nozzle controls the shape, intensity, and power of your spray. Choosing the wrong one can gouge wood, strip paint, or dislodge mortar—and yes, we’ve seen all three happen.
These are the standard nozzle types, color-coded for clarity:
- 🔴 0° (Red tip) – Maximum blast, narrow jet. Only for concrete stains or heavy machinery. Never use on wood, siding, or cars.
- 🟡 15° (Yellow tip) – Medium-strength stripping. Great for prepping surfaces for paint or removing heavy grime from tires or 4x4s.
- 🟢 25° (Green tip) – General-purpose cleaning. The go-to for most home tasks: patios, driveways, cars, and siding.
- ⚪ 40° (White tip) – Soft washing. Ideal for windows, outdoor furniture, and delicate wood.
- ⚫ 65° (Black soap ttip) – Soaping nozzle. Widest spray and largest orifice; used to draw detergent into the line.
- 🔄 Turbo / rotary nozzle – Spins a 0° jet in a cone pattern. Combines the intensity of red with the coverage of green. Ideal for tough surfaces.
Increasing your distance from the surface significantly reduces the effective pressure, though not always in a linear way—closer distances dramatically increase impact. Always start farther away and move closer as needed.
Machine types: Electric vs. gas
Your pressure washer’s power source isn’t just a footnote; it defines where and how you can use it.
Electric pressure washers are
- Best for light residential work
- Quiet, low maintenance, eco-friendly.
- Requires a nearby outlet with GFCI protection.
Gas-powered pressure washers are
- Best for heavy-duty or remote outdoor work.
- Higher PSI and GPM for stubborn tasks.
- Loud, produces emissions, and should never be used indoors—carbon monoxide poisoning is a real risk.
Key components that make it work
- Motor & pump: Electric or gas engine powers a pump (usually axial cam for home use, triplex for pro models) to pressurize water.
- Unloader valve: Regulates pressure when you release the trigger; avoids damaging the system when idle.
- Trigger gun & wand: Your handheld control unit. Attach nozzles here and use safety lockouts when not in use.
- Pressure hose: Reinforced to withstand 1,500–4,000 PSI, depending on model. Comes in lengths up to 200 feet.
- Detergent injector or tank: Some machines let you mix soaps directly; others use a downstream injector. Black nozzle = soap nozzle.
- Total stop system: Turns off the motor when you release the trigger, extending pump life and saving power.
For most homeowners:
- Electric + 25° nozzle + 1.5–2 GPM works well for patios, furniture, and vehicles.
- Gas-powered + 15° or turbo nozzle + 2.5+ GPM is better for driveways, decks, and prepping for painting.
Start broad. Work in passes. Test first. Back off if the surface flakes, chips, or splinters. These aren’t just pressure washing tips; they’re the rules that distinguish a great finish from a ruined surface.
Step 3: Every surface is different—setting and cautions you need
Not all dirt is the same dirt, and neither are the surfaces it clings to. One of the most common pressure washing mistakes is assuming that every material can handle the same force. That’s how decks get splintered, roofs get ruined, and homeowners end up with costly repairs they didn’t see coming.
So before you set your pressure to “blast” and go all out on your property, slow down. Knowing what you’re working with is essential to selecting the right pressure, nozzle, and detergent, and to preventing irreversible damage.
Surfaces that can be pressure-washed (with care) include:
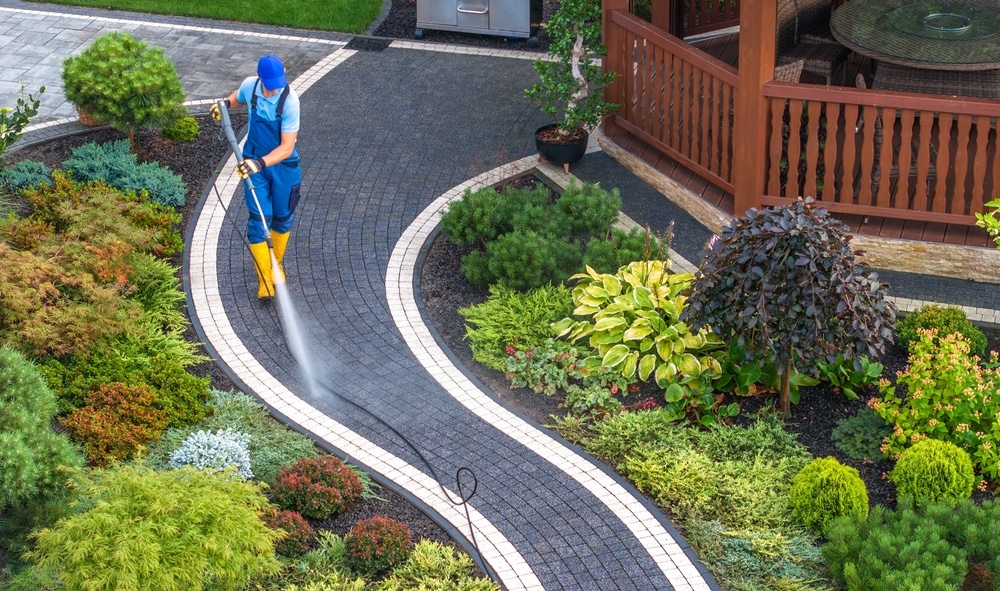
- Cement & concrete: Driveways, sidewalks, and patios made of concrete are some of the safest surfaces to pressure wash. These can handle medium to high pressure, especially if you’re removing algae, tire marks, or embedded grime. But pay attention. Avoid washing over cracks or loose patches—high pressure can worsen existing damage.
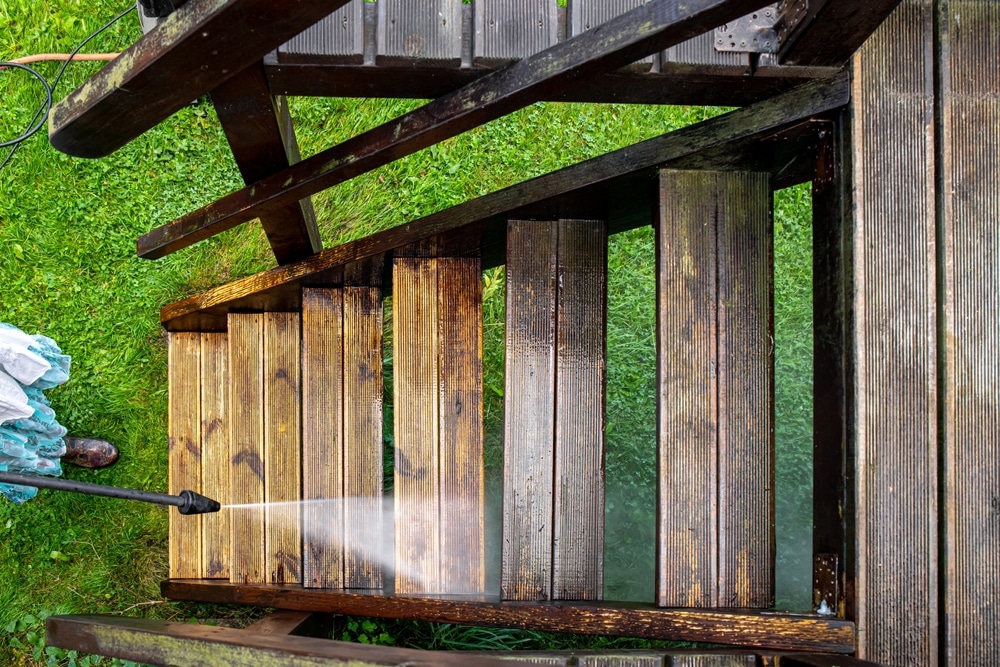
- Decks and patios (most types): Wood and composite decks can be pressure washed, but only with low pressure and a wide-angle nozzle. Older wood, in particular, is susceptible to splintering or furring if hit with too much force. Pro tip: Always spray along the grain, not across it.
- Outdoor furniture: Most plastic, metal, and pressure-treated wood furniture can be safely cleaned using a 25° or 40° nozzle. This includes patio sets, playgrounds, and garden benches. Avoid delicate painted finishes unless you’re prepping to repaint.
- Fences: Wooden and metal fences are generally pressure-washable, as long as they’re in good condition and you use gentle pressure. If you’re prepping for staining, pressure washing is a solid first step. Older or dry-rotted fences may crack or chip.
- Brick: Solid brickwork with intact mortar can handle moderate pressure; it’s perfect for removing mildew and restoring appearance. Avoid washing older brick walls with eroded mortar.
Then, there are surfaces you should not pressure wash, like:
- Asphalt roofs: This is a big no. High-pressure water strips the protective granules off asphalt shingles, dramatically shortening roof life and voiding warranties. Use soft washing with low pressure and roof-safe cleaner instead.
- Old brick or mortar: If the mortar is crumbling, high pressure will only make it worse—possibly destabilizing the wall. Consult a professional who can assess age and stability before proceeding.
- Stained wood: Pressure washing stained decks or siding can strip the finish off in seconds, especially if you use a narrow nozzle or stand too close. Unless you’re planning to restain, stick to soft washing or gentle rinsing
- Windows: Glass may look sturdy, but pressure washing can crack panes or push water past seals, causing moisture damage inside walls. Wash windows by hand or use low-pressure attachments at a proper angle.
- Painted surfaces: Pressure washers are often used to remove paint… which should tell you all you need to know. Avoid pressure washing unless your goal is to strip old paint. Avoid pressure washing surfaces with lead paint due to the risk of airborne contamination and toxic dust. Instead, consult a professional trained in safe lead paint removal.
- Laminar or porous stones: Stones like sandstone or limestone are vulnerable to high pressure and can be easily etched or damaged. Use a low-pressure setting or choose hand cleaning. Water can carve into the material, leaving permanent etching. If it’s decorative or detailed, opt for hand cleaning.
- Electrical boxes, HVAC units, or engines: Electronics and water don’t mix. While these items can handle light rain, pressure washing can force water into delicate components and cause permanent damage. Hand clean with a cloth or low-pressure mist, and avoid direct spray on any electrical panel.
Even surfaces that can be cleaned with pressure washing require proper technique:
- Always test a small, inconspicuous area first.
- Adjust pressure and distance based on the material.
- Be cautious with detergent. Some surfaces, especially older stains and painted finishes, can react poorly to cleaning agents. Always check compatibility first.
And remember, just because you can clean something with pressure doesn’t always mean you should. When in doubt, use a gentler approach or call in a professional who knows the difference.
Step 4: Prep work that pays off
Smart crews understand that the job begins long before starting with preparation. Skipping this step can turn a clean driveway into chipped concrete or splash your trim with stubborn soap. Every minute spent on prep saves time, headaches, and costly damage later.
Start by:
- Cleaning and securing the area: Start by removing anything that doesn’t belong or isn’t wanted, and then blast away. That means furniture, toys, grills, potted plants, and even your car if it’s nearby. Unencumbered space lets you work faster and reduces trip hazards. It’s equally important to close all windows and doors. Even slightly open frames can let pressure-driven water sneak inside, leading to hidden leaks and damage.
- Shield what needs protection: Next, shield the vulnerable. Cover electrical outlets, light fixtures, and delicate trim with plastic sheeting secured by painter’s tape. Never risk water intrusion, or worse, an electrical issue. Your landscaping deserves respect, too. Container plants should be moved or covered. In-ground beds? A breathable drop cloth or painter’s canvas will catch overspray without suffocating them.
- Pre-wet or pre-rinse: Lightly saturate nearby plants and soil before applying detergent or starting the wash. That helps dilute runoff and reduces damage from harsh cleaners.
- Clear the surface: Before blasting, sweep, leaf-blow, or pre-rinse the area to remove loose dirt, debris, and cobwebs. This prevents nozzle clogging and stops airborne grit from damaging surfaces.
- Pre-treat stains: Oil, rust, mildew—they each need their own treatment. Apply a targeted cleaner (like a heavy-duty degreaser or mildewcide) and let it dwell for several minutes before washing. This softens tough stains so the pressure washer works smarter, not harder.
- Test and section: Find the highest point on the surface (like the top of your driveway), and start there—so wastewater runs away, not back toward you. Test the pressure and detergent on a discreet section first. Watch how the surface responds before proceeding.
A bit of prep sets you up for a smooth path forward. At this point, your setup supports accuracy, cleaning power, and long-term results.
Step 5: Techniques that deliver clean, even results
Pressure washing may look like mindless blasting, but the difference between a surface that looks brand new and one that’s streaky, splotchy, or damaged is all about technique.
This is where the project goes from basic to satisfying. It’s about how you move, how you layer, and how you think ahead while cleaning. Let’s talk about the fundamentals that will get you clean, even results without compromising your surface or your time.
- Start slow and test: Before you commit to a visible surface, test on an inconspicuous area—the back of a cushion, the side of a board under furniture, a corner no one sees. Begin at a distance with a wide-angle nozzle, then gradually move in if more pressure is needed. Never start with the nozzle inches from the surface, especially if it’s wood, paint, or fabric.
- Distance = pressure control: How close you hold the wand determines the effective pressure. Closer = stronger. Farther = gentler. This is especially important on softer surfaces like Trex decking, outdoor fabrics, painted wood, or composite railings. Back off if you see flaking, splintering, or discoloration. Rule of thumb: The wand should typically stay 6–12 inches from the surface for most residential tasks. Step in only for stubborn spots—but do so slowly.
- Clean top to bottom: Always work from high to low. If you’re washing multiple surfaces in one area (like railings + decking, or fence posts + ground), start at the top. This way, dirty water flows down across areas you haven’t yet cleaned, not the other way around. This also helps avoid re-contaminating already cleaned surfaces with runoff.
- Feather your passes: Avoid those harsh “pressure stripes” you see in amateur jobs. Overlap your spray pattern by about 50%—just like mowing a lawn—to ensure even coverage. Move in steady, consistent sweeps with a slight arc of the wrist or a clean back-and-forth motion. Rushing or zigzagging causes visible lines that dry unevenly and look unprofessional.
- Know when to use attachments: If you’re cleaning a large area like a deck or patio, switching to a surface cleaner attachment can make a big difference. It attaches like a nozzle but spins in a tight circle, covering 12 inches or more in one pass, making cleaning faster and reducing streaks. It not only speeds up the job but also helps prevent tiger striping, distributes pressure evenly, and reduces user error. Perfect for floors, stone paths, and wide decks.
For more delicate jobs:
- Use a low-pressure nozzle
- Keep the wand farther away
- Start with the back of the surface or fabric
- Avoid direct hits on cracked paint or frayed fabrics
Outdoor cushions, painted railings, and swing seats can be cleaned beautifully, but they require finesse. Don’t expect every stain to disappear instantly; sometimes, you’ll need to pre-treat stubborn spots with a cleaner and then rinse with a pressure washer.
And once you’re finished, sunlight becomes your ally. Allow fabrics to dry in direct sun when possible, as it naturally lightens stains and helps prevent mildew.
Don’t forget: mind your flow. As you work, watch your cords and hoses. It’s easy to get tangled or kink your water line, especially as you move across a patio or switch zones. Take a moment to reset between surface areas to avoid tripping or disrupting water flow mid-spray.
Step 6: Keep it performing with maintenance, winterizing, and clean-downs
The sparkle of a fresh pressure wash doesn’t have to fade fast. Once you’ve put in the effort (or hired the pros), a few simple follow-ups can help extend the results and protect your home’s surfaces.
- Clean your gutters again: After pressure washing, clogged gutters can undo your hard work in just one rainy day. Overflowing leaves and twigs don’t just create a mess; they can splash dirt back onto your siding or cause streaking. Make sure gutters are clear to keep walls and foundations looking their best for longer.
- Trim back trees and shrubs: Think of landscaping as part of the cleaning equation. Overgrown bushes or drooping tree limbs shed leaves, pollen, and flower debris that cling to newly washed walls. By pruning them back—especially those close to your home—you’ll reduce grime buildup and protect your siding from scratches.
- Stick to a routine: One wash doesn’t make a maintenance plan. Grime, mold, and pollutants don’t wait years to reappear. Consider a seasonal or annual schedule to stay ahead of buildup. Many homeowners opt for a professional cleaning once or twice a year, just enough to reset the clock without overdoing it. A little post-wash planning can help you protect your investment and preserve that “just cleaned” feeling for much longer.
Contact us here if you would like to find the best painting contractor for your residential or commercial painting needs.
When Pressure Washing Services Make More Sense Than DIY
Pressure washing is one of the most satisfying ways to restore curb appeal—but doing it wrong can cost you more than you’d expect. While renting a machine and handling the job yourself might seem like a solid weekend project, it’s often the less efficient, more expensive, and riskier option over time.
Professional pressure washing services bring more than just water pressure. They bring experience, training, and high-grade equipment that most DIYers don’t have access to. To begin with, commercial pressure washers use tools that are dramatically more powerful than consumer rentals, allowing professionals to clean faster, deeper, and more safely, and with that comes fewer headaches, better results, and insurance in case anything goes wrong.
DIY pressure washing conceals costs many homeowners overlook. Costs such as:
- Renting equipment
- Buying materials
- Buying safety gear
- The real risk of having to fix surfaces accidentally damaged by high pressure
And while DIY projects might offer personal satisfaction and short-term savings, that all goes out the window if you etch your siding, damage your deck, or blast paint off your trim.
Most importantly, pros know what not to do with a pressure washer. They know when to step back, when to switch nozzles, and how to clean effectively without tearing up soft materials or leaving behind streaks. Professional pressure washing tips aren’t just about doing more; they’re about doing it right.
Uh-Oh Moments: The Most Common Pressure Washing Mistakes
If you’ve ever seen a sidewalk with etched tiger stripes or siding that looks like it lost a fight with a sandblaster, you’ve witnessed a DIY gone wrong.
Here are some of the most common mistakes homeowners make with pressure washing:
- Using the wrong pressure setting: High PSI might seem like a shortcut to clean, but it can crack wood, dent siding, and strip paint from delicate surfaces.
- Ignoring safety protocols: Without proper technique and protective gear, you risk injuries from water recoil or chemical splashback.
- Incomplete cleaning: DIY washers often lack the power or nozzle variety to remove deep-rooted grime, leaving behind stains that reappear fast.
- Over-cleaning: Repeated passes in the same area can lead to discoloration, warping, or gouges, especially on wood and painted surfaces.
- Blasting near electrical or fragile areas: One wrong angle and water gets into outlets, window seals, or behind cladding, causing mold, leaks, or costly repairs.
Misusing high-pressure water can damage siding, harm landscaping, and crack or force water past window seals. Professionals know how to avoid these issues and fix them if they occur.
Pro Secrets: Small Details That Make a Big Difference
More than having all the pressure washing tips, professional pressure washing services do it differently. And this is why it matters:
- Surface-specific technique: Pros adjust PSI, angle, and cleaning agents based on the material: wood, stucco, vinyl, and concrete, each of which requires different approaches.
- Commercial-grade equipment: From high-GPM machines to specialized surface cleaners, professionals use tools designed to clean large areas without streaks, something even the best rental machines find difficult to match.
- Time efficiency: What takes a homeowner an entire day (or weekend) often takes a pro just a few hours, with better results. This makes the process not only faster but safer.
- Long-term benefits: Regular professional maintenance reduces the buildup of mold and mildew, which protects surfaces and saves money on repairs down the line. It is a more worthwhile investment over time.
- Eco-conscious solutions: About 60% of professionals use biodegradable cleaners and reclaim systems to reduce environmental impact, while only 30% of DIYers prioritize them.
In short, professional pressure washing tips aren’t just about pressure; they’re about precision.
Whether you want spotless siding, a driveway free of algae, or prep work that sets the stage for a long-lasting paint job, the right tools—and the right team—make all the difference. If your goal is efficiency, safety, and value, hiring pressure washing services is often the smart move.
And if you’re thinking about taking it on yourself? Just remember: pros know what not to do with a pressure washer. That knowledge alone might be worth every penny.
Pressure Washing Tips: Bringing All Together
Whether you’re sprucing up your siding or deep-cleaning a mossy driveway, the key to great results lies in pressure washing tips that go beyond the basics. It’s not just about pressure, it’s about preparation, technique, and knowing when to DIY and when to delegate.
From safety gear to nozzle choice, from surface sensitivity to maintenance routines, pressure washing rewards attention to detail. And if you ever feel unsure, don’t gamble with your home. Professional pressure washing services bring not just better tools, but experience, strategy, and protection against costly mistakes.
Your home deserves more than a high-powered hose-down. It deserves a clean that lasts, and the wisdom to get it done right.
Discover the Koehn Painting difference – contact us today for a free estimate and step into a vibrant, freshly painted home!


")