What All Deck Painters Must Know: Times, Tools, and Paint
If you’re one of the many deck painters—whether homeowner, weekend warrior, or seasoned pro—tackling the question of how to paint a deck always begins with this truth: knowing the whole process from A to Z is your best insurance.
Failing to prioritize proper prep, timing, or materials will lead to frustration as your efforts fall apart. Conversely, using correct timing, tools, and paint ensures your deck remains durable and looks great for years.
So, before you pick up a roller, let’s walk through everything you need to know now to avoid common mistakes and secure a lasting finish.
Is It Time to Paint? Here’s How to Know
Timing is fundamental, and not just any time will do. As a general rule, a painted deck typically requires a fresh coat every 5 to 10 years, depending on weather exposure and the deck’s maintenance history. But beyond the calendar, here’s what to look for:
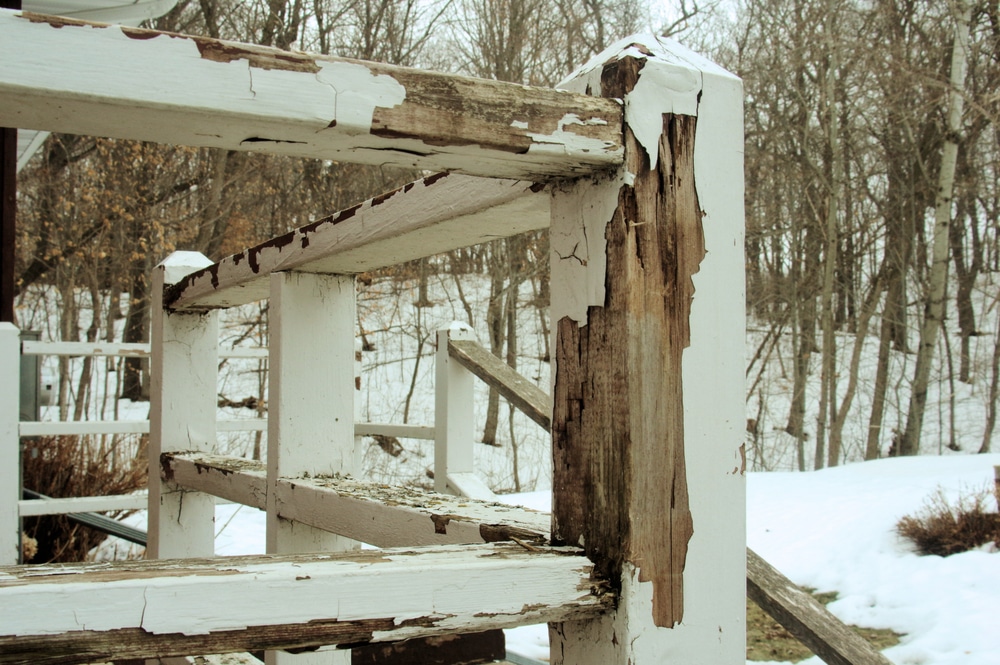
- Visible peeling, cracking, or flaking paint. These are clear signs the surface is no longer sealed.
- Water behavior test. Drag a hose across the deck: if water absorbs quickly instead of beading, protection is gone.
- Fading or graying. UV damage shows when the color dulls or the wood begins to fade.
- Tender wood or splinters. Aside from aesthetics, this suggests inadequate protection, making the area unsafe underfoot.
Not all parts of the country follow the same seasonal playbook, so timing your project depends on where you live. What you’re looking for is a dry stretch of days with consistent daytime temperatures between 50°F and 85°F, low humidity, and no rain forecast for at least 48 hours after painting.
Here’s how that breaks down by region:
- Midwest (e.g., Wichita, KS): Late spring (late April–early June) and early fall (late September–mid-October) offer moderate temps and stable weather, ideal for painting. Summer heat and humidity can cause paint to cure too fast and peel; early fall’s cool nights and dry air produce better results. Minor tip for Wichita: aim for days around 70°F, low wind, and ensure the deck surface feels comfortable to touch, not hot.
- Northeast/New England: The best times are late spring (May–early June) and early fall (September). During these seasons, temperatures range from 60–85 °F, humidity is low to moderate, and there’s minimal rain, making them ideal for painting.
- Southeast (e.g., Florida, Georgia): Summer heat and frequent storms make painting risky. Opt for late fall through early spring when humidity is lower and rain is less frequent.
- Pacific Northwest: Ideal deck-painting weather appears in mid-to-late summer, when dry conditions prevail. Early fall may work if you get a dry spell between rains.
- Southwest (Arizona, New Mexico): Spring (March–May) and early fall (September–October) are your best bets. Avoid painting during scorching summer heat, or at least schedule sessions for early morning or late afternoon.
- West Coast (California): With steady spring to early-fall weather, you have flexibility. Avoid direct midday sun or heat waves, and follow the general ranges below.
Everyday Painter Checklist
In essence:
- Check the 7-day forecast.
- Target days with 50–85°F, 40–60% humidity, and no rain for 48 hours.
- Paint in the morning or late afternoon to avoid peak sun.
- Make sure the deck surface is touch-friendly. Not hot or cold.
By tailoring your painting schedule to your local climate—and paying special attention to your area—you maximize adhesion, drying, and longevity. The result will be a deck that looks great and performs well for years.
Don’t Start Without This: Deck Paint & Prep Essentials
Before the roller hits, prep work makes or breaks longevity. Here’s your essential checklist:
- Clean thoroughly. Use a deck cleaner or mild soap with a stiff brush or pressure washer (low PSI). Removing dirt, mildew, and old coatings ensures your paint sticks
- Repair damage. Replace rotten boards, tighten loose nails or screws, and fill holes or seams with an exterior-grade wood filler.
- Deep sanding. Smooth rough or flaking areas, especially on previously painted or stained wood, to enhance adhesion.
- Priming when necessary. Use a quality primer if switching from stain to paint, painting hardwood, or covering bare wood.
- Check moisture. Wood must be dry. Pressure-treated lumber often needs 60–90 days to air out before coating
- Plan the forecast. Choose a block of dry days. The 48-hour dry window after the final coat is non-negotiable.
There’s something more to add to this list, and it’s that step number 3 might be a bit tricky. If you’re feeling overwhelmed by the idea of sanding an entire deck and have been wondering if you can paint a deck without sanding, there’s good news: with proper prep, you can skip full sanding on decks that aren’t extensively weathered or heavily coated.
You can achieve this by using a strong deck cleaner to lift and dissolve old coatings without sanding, carefully pressure-washing to remove loose fibers and remaining coatings, and spot-sanding only the problem areas instead of the entire deck surface.
Deck painting is precisely one job where skipping prep is a false economy. Take the time now, or pay for a redo later.
Deck Paint vs. Stain — What’s the Difference and How to Choose?
Choosing between deck paint and deck stain is one of the most important decisions you’ll make when learning how to paint a deck or refinish it. Here’s a full breakdown of the differences:
Deck paint:
- Forms a protective film on top of the wood, creating a durable, sealed surface.
- Offers a wide variety of colors. Ideal if you want to match your deck to your home’s trim, siding, or shutters.
- Hides imperfections, including cracks, weathering, and mismatched boards, making it a smart choice for older or previously repaired decks.
- Provides a longer lifespan than stain when properly applied; can last up to 10 years with minimal touch-ups.
- Requires more prep, including cleaning, sanding, and sometimes priming.
- Can peel or chip over time if applied incorrectly or if moisture becomes trapped beneath the paint layer.
- It’s difficult to reverse. Once you paint your deck, switching back to stain requires stripping, sanding, and a lot of work.
On the other hand, deck stain:
- Penetrates the wood grain instead of covering it, preserving the natural texture and character.
- Enhances the wood’s appearance, especially in high-quality materials like cedar, redwood, or cypress.
- Available in various opacities, such as clear, semi-transparent, and solid stain options.
- Requires less prep than paint—usually just cleaning and spot-sanding.
- It is more forgiving when used in less-than-ideal conditions (e.g., slightly higher humidity or minor surface imperfections).
- Needs to be reapplied every 2–5 years, depending on product type, exposure, and climate.
- Won’t conceal deep flaws or patched areas, so not ideal for heavily weathered or older decks.
So, when thinking about deck paint vs. stain:
- Choose deck paint if your surface is aged, patched, or if you want more color control and longer durability.
- Choose a deck stain if your wood is in excellent condition and you want to highlight its natural beauty with a more subtle, rustic look.
Match Your Deck to the Right Paint: A Quick Guide
Different decks demand different chemistry:
- Standard wood decks: Use a high-quality exterior-grade acrylic latex paint. It offers excellent UV resistance, flexibility, and breathability, which is ideal for wood that expands and contracts with changing weather. Acrylic paints are easy to apply, low in VOCs, and clean up with just soap and water, making them a go-to for most DIY deck painters. Just be sure to match the new paint to the old type (acrylic or oil-based) to avoid adhesion issues.
- Worn or cracked wood: Consider using a deck resurfacer or thick elastomeric coating designed to fill cracks, cover splinters, and create a non-slip surface. These paints provide visual consistency and enhance safety, making them ideal for aging decks that need both cosmetic and structural care. Though thicker and slower to dry, they can extend a deck’s life without the expense of a full replacement.
- Composite decks: Use a specialized composite deck paint that adheres to plastic and resin materials. Standard wood paint won’t bond well and will likely peel. Look for acrylic-based options with added bonding agents. Always check the paint label or your deck manufacturer’s recommendations to ensure compatibility.
- Concrete decks/patios: Apply a masonry or porch-and-floor enamel paint formulated specifically for concrete surfaces. These paints resist moisture, offer UV stability, and often include anti-slip additives to improve traction. Prepping the surface—through cleaning, etching, or priming—is essential for durability.
- Bare wood or switching finishes: Always use a primer. A quality primer promotes better adhesion, prevents blotchiness, and helps block stains or tannin bleed, especially in woods like cedar or redwood. Priming is particularly important if you’re switching from oil-based to acrylic paint or painting raw or heavily sanded areas.
Also, pay attention to sheen levels. A lower sheen camouflages dirt and flaws, while a medium sheen appears cleaner but reveals imperfections more clearly. Ask your supplier for “deck & porch” specific products with mildew resistance.
The Ultimate Deck Painting Toolkit
Here’s what every competent deck painter should have on hand for a polished finish:
- Cleaning gear: Pressure washer (low PSI) or scrub brush with deck cleaner. Essential for removing grime and mildew.
- Sanding tools: Orbital sander or pole sander with 60–80 grit sandpaper.
- Scraper: To remove loose coatings or flaking paint.
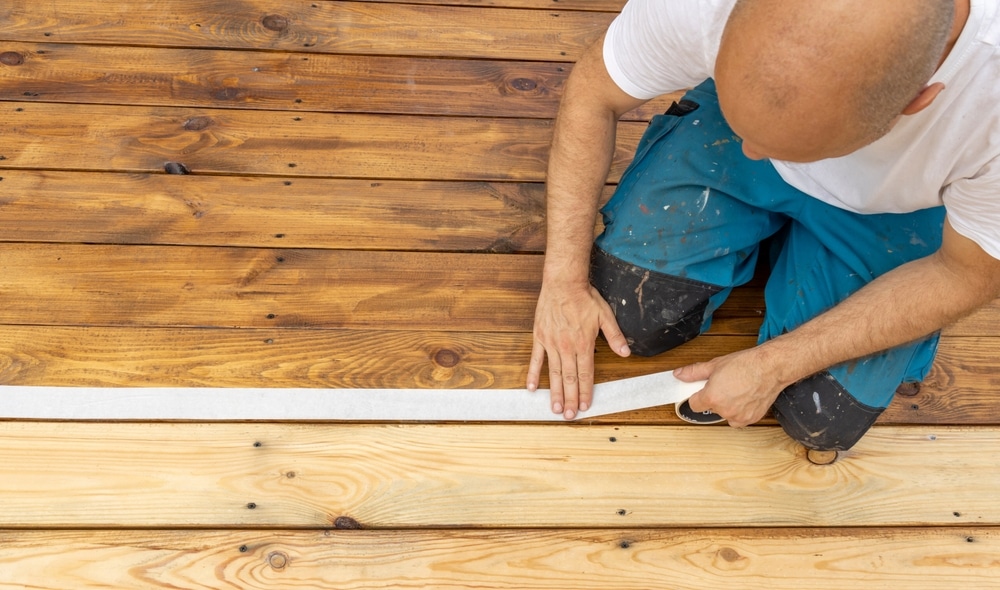
- Tape & drop cloths: Prevent overspray or drips from ruining surrounding surfaces.
- Paint brush (angled sash): Great for edges, seams, and railings.
- Roller + extension pole: Covers a large surface area quickly and evenly.
- Paint trays and liners
- Stir sticks, gloves, and safety glasses
- Optional additions: Anti-slip additive, deck primer, resurfacing paint for worn boards.
For decks used after rain or around pools, sprinkle-in anti-slip granules make a huge difference, because even a fresh paint job can be dangerously slick without them.
By now, you’re equipped with the reasoning, timing strategy, product know-how, and gear checklist needed to master how to paint a deck. The rhythm is clear: test, clean, prep, paint, and your deck pays back in performance and beauty.
Contact us here if you would like to find the best painting contractor for your residential or commercial painting needs.
Hands to Work: How to Repaint a Wood Deck Step-by-Step
If you’re interested in how to repaint a wood deck and ensure it won’t peel again within six months, you’re in the right place. This guide is helpful for DIY homeowners or detail-oriented deck painters, as it covers every essential step—from preparation to finishing—to achieve long-lasting results.
It even answers the common questions we always hear: “Can you paint straight onto decking?” or “How long after washing a deck can you paint?” Well, let’s get to it!
Phase 1: Prep – Cleaning, Sanding, Repairing, and Priming
You might wonder: Can you paint straight onto decking? The short answer: not if you want it to last. Proper preparation is the foundation of a quality deck paint job. Here’s what needs to happen before any paint goes on:
- Strip peeling paint or solid stain: If your deck has small peeled spots, spot-scrape with a scraper and fine-grit sandpaper, then prime and paint only those areas. Full removal isn’t necessary, but it may look uneven. If peeling is widespread, strip back to bare wood completely. Use a belt sander (40–60 grit for pine, 36–40 for hardwood) to remove old paint.
- Smooth and tidy the surface: After stripping, switch to an orbital sander with 80-grit sandpaper for a uniform, smooth finish. This removes sharp edges where leftover paint meets raw wood.
- Clean thoroughly: Sweep or vacuum to remove all dust and debris. Then use a deck brightener (oxalic acid-based) to neutralize stains, remove tannins, and fully prep the wood. Hose off thoroughly.
- Dry completely: Here’s the answer to the question: “How long after washing a deck can you paint?” A minimum of 2–3 days of dry weather is required. Any trapped moisture will cause bubbling or peeling.
- Repair and fill defects: Replace or reinforce rotten boards, tighten loose fasteners, and fill holes or cracks with exterior-grade wood filler. Let it dry thoroughly.
- Prime where needed: If you plan to paint a deck with a primer coat, apply it now, especially over bare wood or repaired areas. Primer enhances adhesion and prevents staining bleed-through.
Proper prep may feel tedious, but if you’re wondering how to paint a deck and don’t want to follow these steps, there’s a good chance you’ll have to redo it in a year. Follow these steps and your deck painters—or you—will achieve a durable, professional-grade finish.
Phase 2: How to Repaint a Wood Deck, Step by Step
Hands to work! Here’s how to tackle the actual painting process with confidence:
- Open the paint and stir: Give it a thorough stir to get a consistent color and texture.
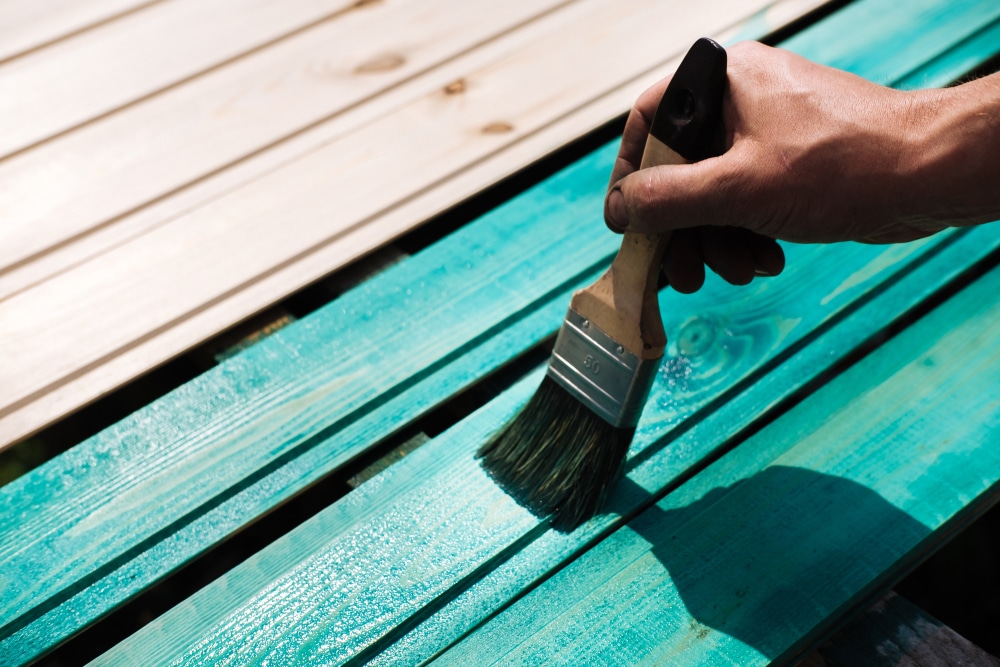
- Cut in edges and railings: Use an angled sash brush to paint carefully along rail posts, stairs, and the deck perimeter.
- Roll the deck surface: Use a medium-nap roller and extension pole. Load lightly, roll smoothly. Apply three thin coats, letting each dry according to the manufacturer’s guidelines (usually 4–6 hours for acrylic, up to 24 hours for oil-based).
- Blend spot repairs: If you patched a peeling area, paint the entire deck after the primer dries for seamless integration.
- Follow the drying window: Wait until the deck feels dry underfoot (usually 24 hours). Then apply the second coat—and if necessary, a third.
- Cure fully before use: Follow that era of patience and wait 7 days for proper cure before placing heavy furniture or planters. Though it may feel dry, it’s not fully set and still vulnerable to scratches.
This process ensures your deck is not just painted—it’s revitalized. You’ll know you’ve done it right when even textured resurfacing looks smooth and strong underfoot.
Painting Safely: Instructions for DIYers
You’ve got the tools and step-by-step, but don’t skip this section. Safety matters — and yes, it’s partly why hiring professional deck painters is a smart and often chosen option:
- PPE for protection: Gloves and safety glasses are essential. If using oil-based paints or strippers, add a respirator mask to protect against VOCs and fumes.
- Ladder and ledge safety: Always maintain three points of contact. When painting stairs or railings, make sure ladders are securely anchored.
- Ventilation matters: Paint in a well-ventilated space. Avoid tight corners, and keep windows or doors open to prevent inhaling fumes.
- Pet and kid access: Use barricades or signage to keep them off the deck for the full 7-day cure.
- Chemical caution: Paint strippers, brighteners, and cleaners can stain clothing or harm landscaping—work with drop cloths and avoid overspray.
It may seem like overkill, but skipping these steps often leads to a triple-repair, or worse, injuries. If this checklist makes you want to hire experienced deck painters instead, try us.
Deck Maintenance After Painting
You nailed the painting, now keep that fresh look going. Maintenance is what turns a good job into a job well done. Make sure these steps are followed accordingly:
- Clean seasonally: Sweep off debris to prevent moisture buildup. Hose with mild soap if needed—but wait at least a week after coating to clean.
- Touch up annually: Look for scuffs or wear. Small touch-ups each spring preserve the full finish and avoid the need for total repainting.
- Avoid harsh tools: Use non-metal shovels for snow and gentle bristle brushes. Metal blades or stiff wire brushes can scratch the paint.
- Monitor moisture: Ensure water isn’t pooling under planters. Elevated pot feet help airflow.
- Plan for recoating in 8–12 years: Even the best paint will fade over time. With this maintenance, you’ll get about a decade between major repaints—maximizing cost-effectiveness and curb appeal.
By following this guide, you’ve learned how to repaint a wood deck from start to finish, covering prep, safety, and long-lasting results. These methods ensure your deck not only looks great but also remains beautiful and prote
Frequently Asked Questions on How to Paint a Deck
You already know how to paint a deck, but probably still have some questions…
What is the best way to paint a deck?
Start with thorough cleaning and preparation—scrape and remove peeling paint, sand lightly, clean with a brightener, then apply primer and use a roller and brush for two thin coats. This method ensures durability and even coverage.
Is it better to roll or brush a deck to paint it?
Use a brush to cut edges and a roller for large areas; rollers cover efficiently and match texture better than spraying or just brushing.
Should I pressure wash my deck before I paint it?
Yes—light pressure wash (or scrub by hand) cleans grit, mold, and old coatings, improving paint adhesion and longevity.
Is it better to spray or hand-paint a deck?
Spraying is faster for complex shapes but requires experience and masking; rolling and brushing offer precision and are safer for most DIYers.
Is it better to oil or stain decking?
Oiling and staining penetrate wood to enhance grain but wear faster; paint provides color depth and longer-lasting protection, especially on older decks.
Do I need to scrape my deck before painting?
Yes—scraping removes loose and flaking paint or chips, preventing upcoming layers from peeling prematurely.
What not to do when staining a deck?
Never stain over mold, peeling paint, or rain-soaked wood—always clean, dry, and strip first to ensure stain penetration and adhesion.
What is the most popular color to stain a deck?
Natural tones—such as cedar, light brown, or grey—are the most popular, highlighting wood grain and blending seamlessly with outdoor surroundings.


")
